Let’s say you need a fully automated registration and admission system for an event you are hosting. Could be a small wedding, for example.
You want to set up a page where people can RSVP with their contact details after you send them an invite, and then give them a QR Code they can use at the door to prove they are invited.
You can achieve all of this within Airtable, with only two external open-source dependencies.
Create registration form and backend table
To keep the workflow simple, store both registered and checked-in guests in one table, then use views to separate them. This will make the entire system easier to build and maintain.
Since this is a wedding, we will collect only each guest’s Name and Email. Then we can have a Status field with a default value of Registered and an attachment field for the QR Code.
Also add a Created Time field to record when a guest registers, and a Last Modified Time field that updates only when Status changes. Together, these fields show when a guest changes from Registered to Attended, that is, their entry time.

Fields needed for our table
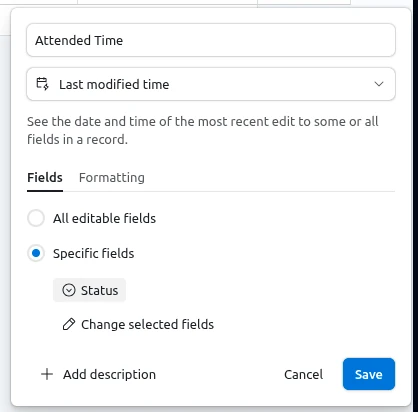
For any guest who is marked as Attended, this field will reflect their entry time.
With our fields ready in the backend, we need to create a form for our guests to confirm attendance. A simple Form view is enough, though we can use a Form Interface, or even an external form engine like Typeform, if we want more control over the flow or styling. In this case, let’s use a simple Form view.
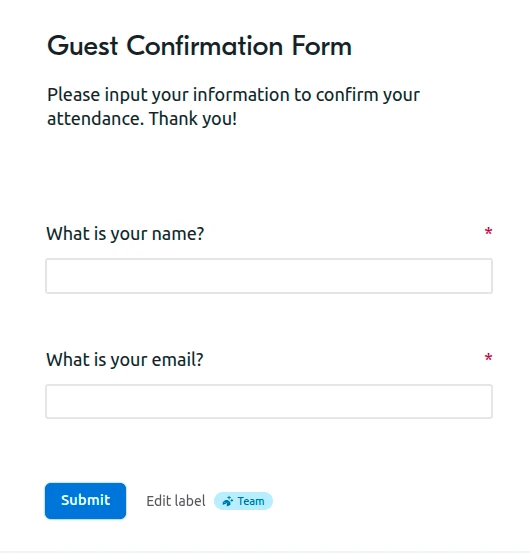
Our invite confirmation form
Create automation to add QR Code to the guest record.
We will need an automation to generate the QR Code and attach it to the guest record. Fortunately, we don’t even need to write code, because we can use a free API, like QuickChart’s.
Using the QuickChart QR Code API, we only need to generate a URL with the following format: “*https://quickchart.io/qr?text=*” and concatenate our desired text to the end of that string. That text can be a message, a URL, anything that we can put in text. That text will be the content of the QR Code once it is scanned. Like this, for example.
Please note that this API is flexible, and you can do things like embedding an image in the center of the code, or changing its color and borders; you just need to look over the options on their documentation.
For our purposes, we will use a URL that points to a webhook, which we will notify when the code is scanned. That webhook will then trigger the actions we want to take after the code is scanned.
That, however, requires some prep work so we have a webhook listener ready for next actions.
Airtable has a feature to create an automation with the trigger “When webhook received”; unfortunately, Airtable’s webhook listener trigger only receives POST calls, and we will be making a GET call, by loading a page when the code is scanned, so we will need to use middleware.
You should be able to set up a webhook receiver on any iPAAS like Zapier, Workato, Zoho Flow or n8n. We are going to use n8n because this is a feature you can use for free in the self-hosted version.
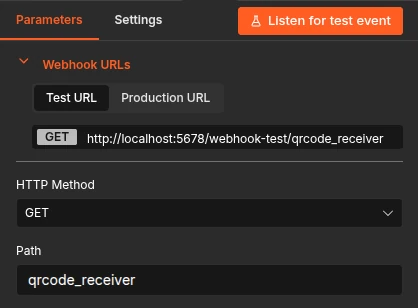
Webhook trigger on an n8n flow
This trigger will give us a URL, which we will put in our QuickChart code builder URL, for example:
https://quickchart.io/qr?text=http://localhost:5678/webhook-test/qrcode_receiver
However, that only notifies our webhook; it doesn’t send any data. So we need to append the data we want to send to that URL, like this:
https://quickchart.io/qr?text=http://localhost:5678/webhook-test/qrcode_receiver&userId=123456abc
Yes, this URL is on my local machine, you will need to have a public webhook URL to make this work. This can be done using ngrok, for example.
Now that we have a URL we can use to generate the QR Code, we need to make sure the user Id from our Airtable base is being set as the text contained in the code. So we need to insert that variable using the automation builder.
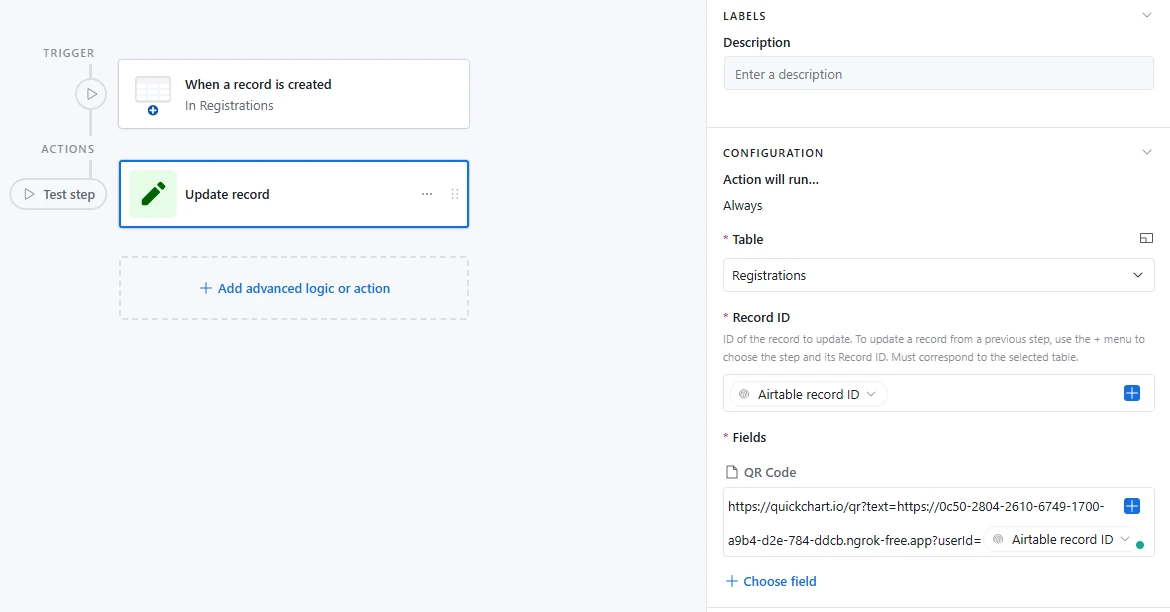
Airtable automation to attach the QR Code to the guest record.
Your automation should look like the above. We trigger it when a record is created in the same table where we have our Form view, and after that we simply update the created record’s QR Code attachment field with our URL, which is formed by QuickChart’s root URL, our webhook URL, and the created record’s ID.
Set up an email to send the code to the guest.
Once we have generated the QR Code, we need to send it to the guest so they have it readily available at check-in.
This is easy to do with an Airtable automation too.
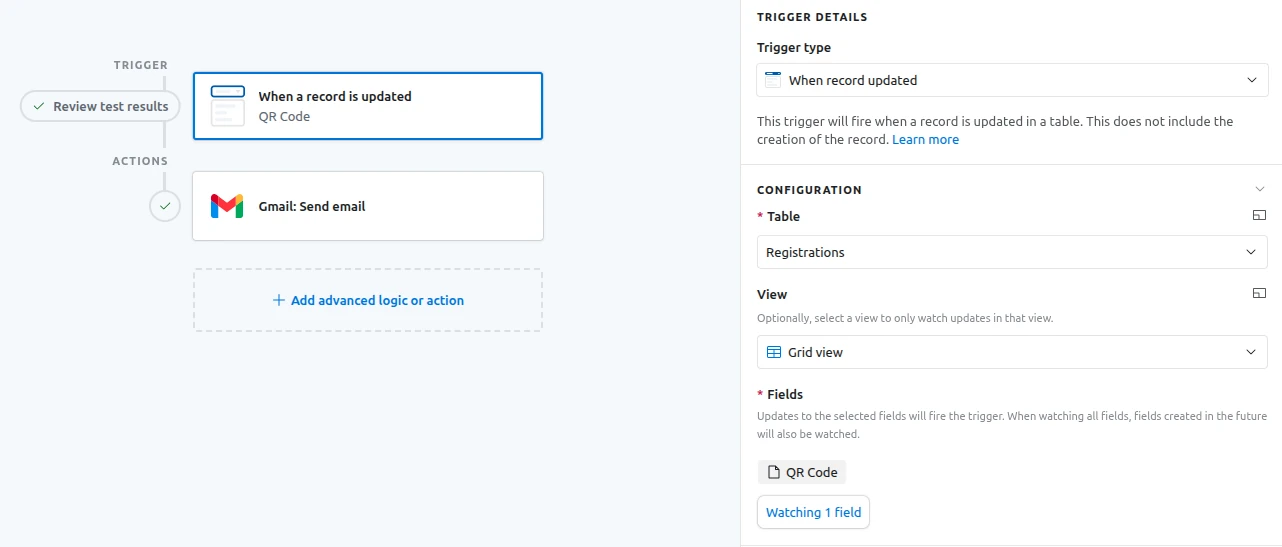
Airtable automation to send a confirmation email
We just need to listen to when a record is updated in our table, and have the trigger listen specifically to the QR Code attachment field. That way, this is triggered by our first automation updating the record with the generated QR Code.
In my experience, the Outlook email sending action provides more flexibility (like showing the QR Code inline, instead of as an attachment), but Airtable’s native action or Gmail will work too. This is the result with a very simple email body.
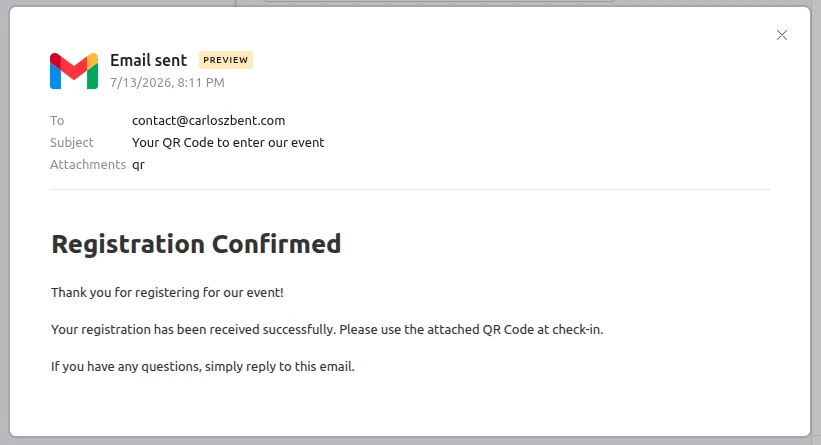
Example of a confirmation email.
Create automation to update guest status.
Now, back to the webhook, we need to actually set it up to update the guest status in our table. Start your n8n webhook listener in test mode and make a request.
You can make a request by scanning the QR Code you just generated while testing, or by making a test call using a tool like Postman or Hoppscotch (I prefer Hoppscotch because it is waaay lighter).
If your call is successful, you should see something like this in your trigger logs:
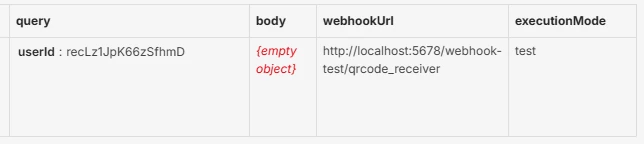
Data received in the trigger of the status update automation.
Now that we have our Airtable record Id for the scanned guest in the automation, we need to update the status in Airtable. Luckily, Airtable has a native connector in n8n, so we just need to connect our credentials and set up the update.
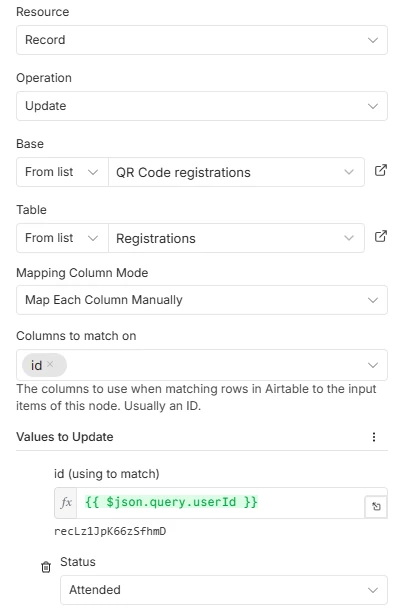
Mappings of the Airtable record status update
After that step runs, you can go back to the Airtable base, and if you check the activity history for the record, you will see something like this:
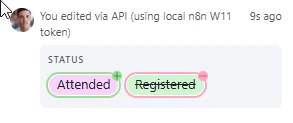
Example of record activity logs after API update.
If you used n8n, your flow will be as simple and beautiful as this:
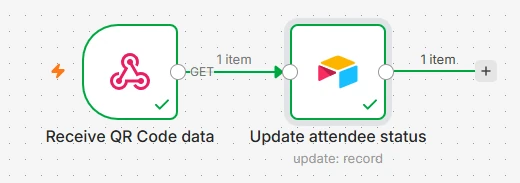
Final look of the status update flow in n8n.
After running a few tests and setting up your views to separate the people that attended from those that didn’t make it, you can publish your automations, and you will have a completely automated system to handle registrations and attendance to your events, using QR Codes. And if you use the tools I used in this example, you will be able to do it completely free.
This is the simplest version of this workflow, and there is room for more features, like sending a confirmation email after scanning the code, maybe with the event agenda or a welcome message; including other secret data in the code that makes the entry more secure; or limiting the flow to update the status only at the time of the event (to prevent the effects of a guest scanning it themselves upon receipt).
Thanks for reading!